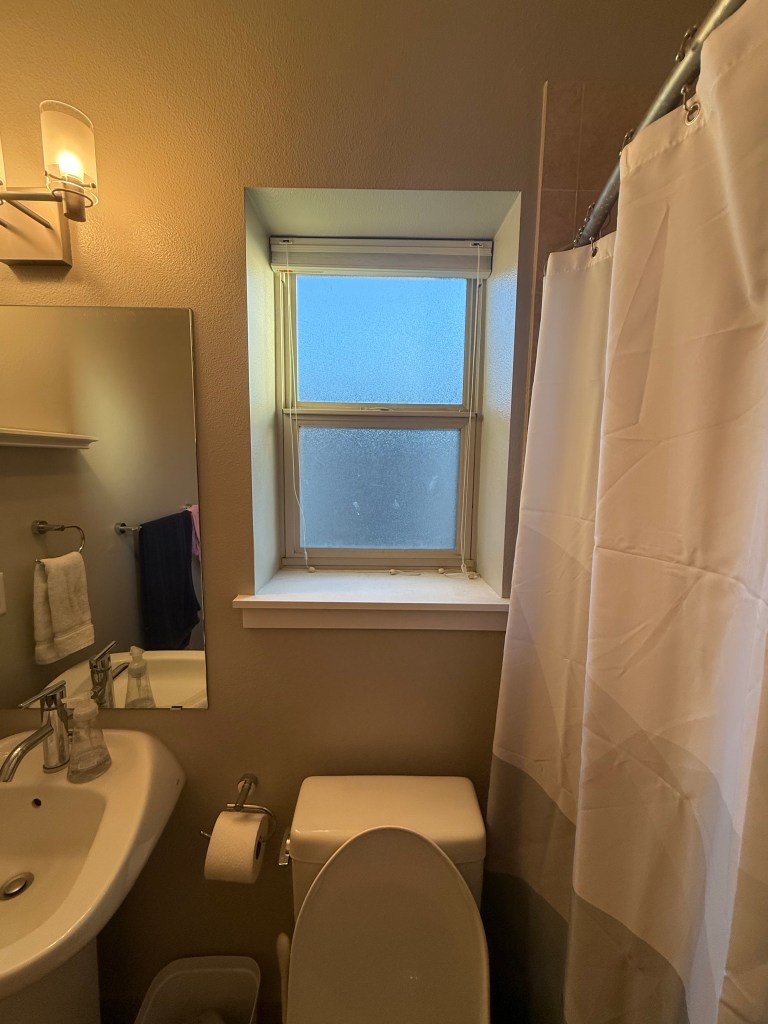
BEFORE AFTER
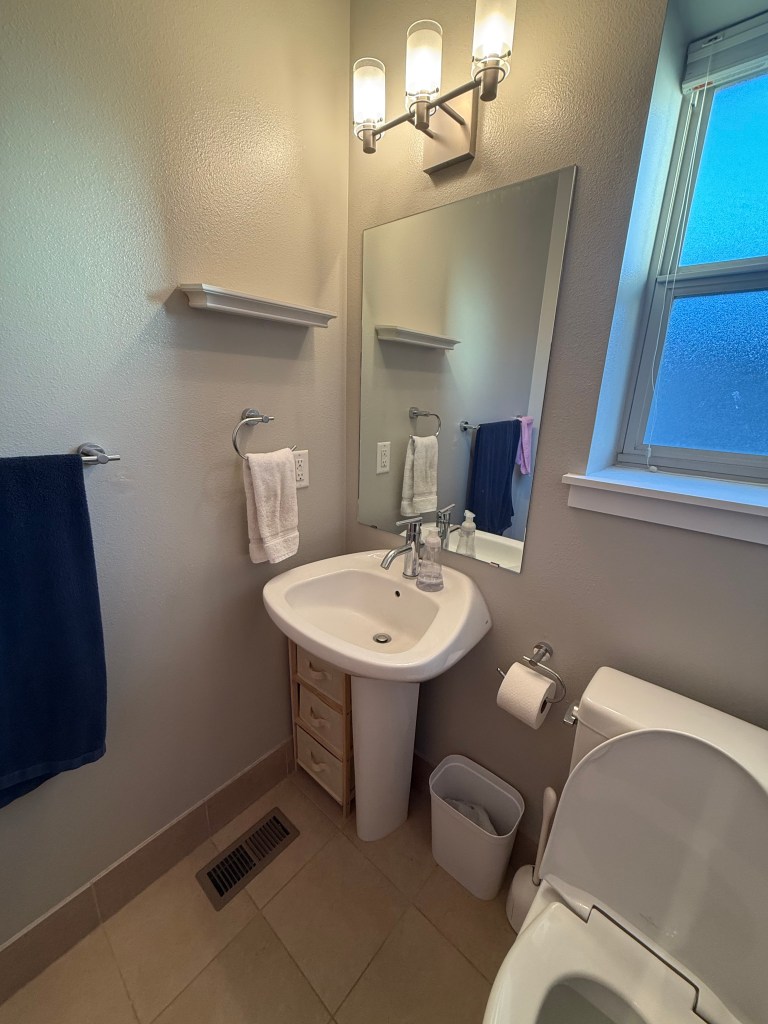
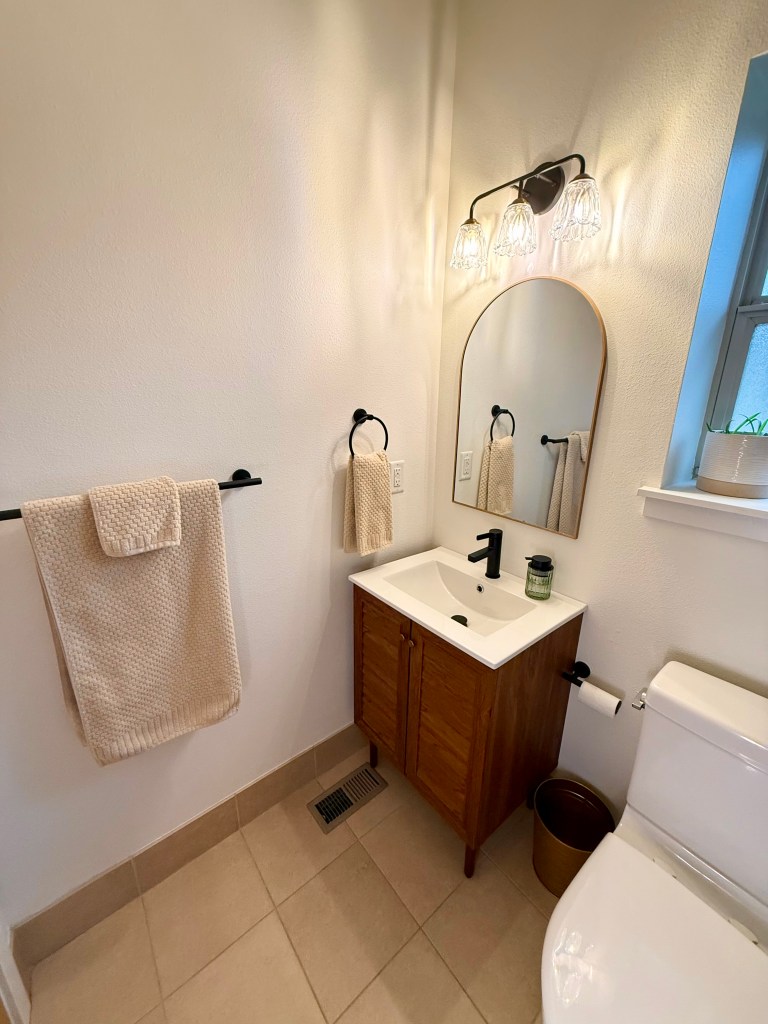
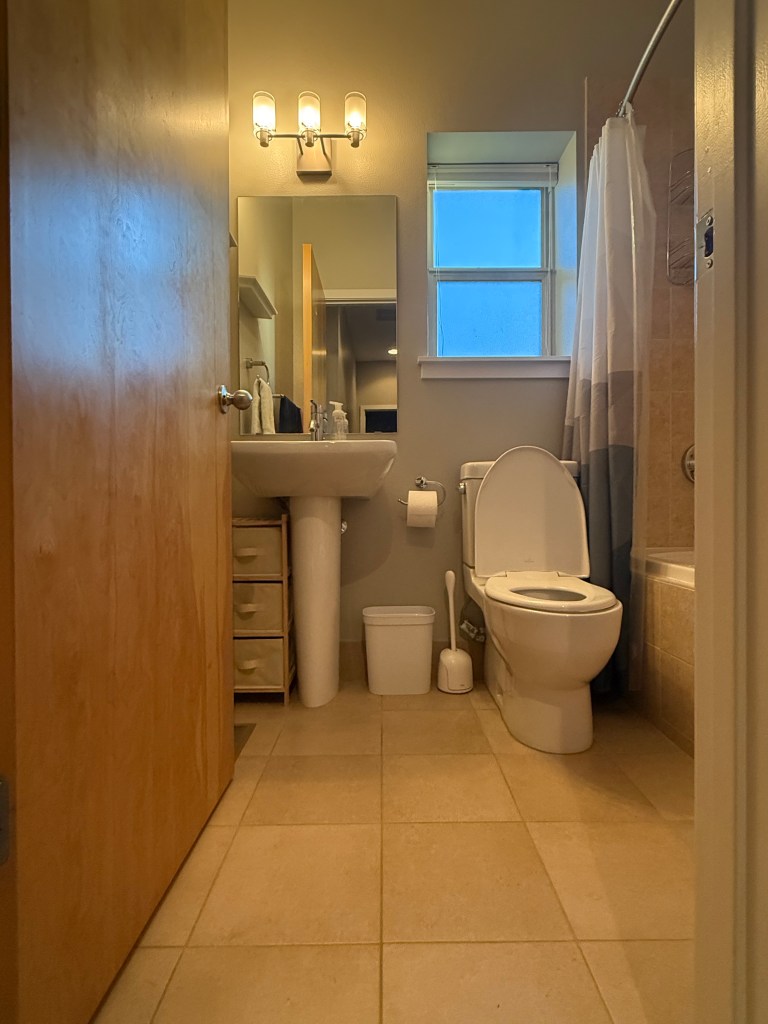
Our guest bathroom was in no way functional for actually hosting guests. The pedestal sink left no room for personal items, we had no functional storage, plus the hardware wasn’t level. In addition to updating all of the builder grade features, we ripped out pedestal sink and replaced with a proper vanity, brightened everything up, made some necessary fixes, and decorated it in a way that was both seller friendly with personality. it went from dark, gray, builder grade to light, bright, updated, and earthy.
Only here for product links? I get it. Let’s start with those before we get into the tutorials!
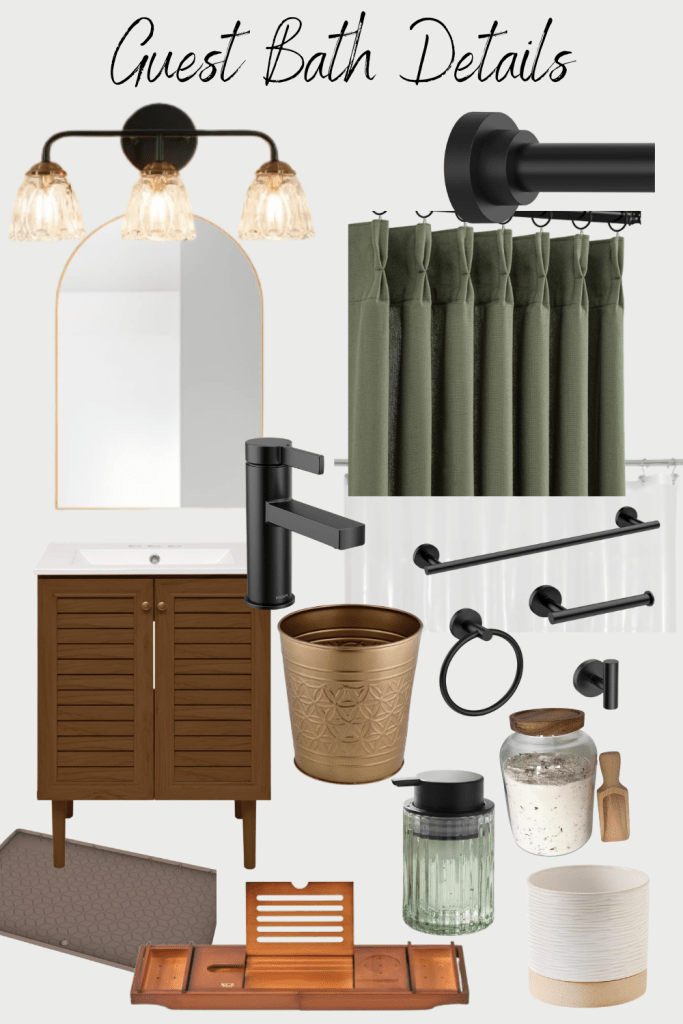
- Vanity
- Vanity Light
- Faucet
- Mirror
- Curtains/Shower Curtain
- Long Shower Curtain Liner
- Shower Curtain Rod
- 4 Piece Hardware Set
- Waste Basket
- Foaming Soap Dispenser
- Planter
- Bath Salts Jars
- Bathtub Tray
- Under Sink Mat
- Rub n Buff
- Small Hole Patch
- Large Hole Patch
- Wall Texture & Primer
- Mini Vanity Caulk & Tub Caulk
Step 1: Removal, Patching & Painting
We started with removing all of the old hardware, vanity light, mirror, and the pedestal sink. The pedestal sink was in two parts, the stand and the basin. They were sealed/caulked into the wall and floor. Additionally, the basin was bolted into the wall. First thing, is shutting off the water supply and having a small container and towels on hand. We cut the sealant with a utility knife using multiple shallow cuts. This is definitely a 2 person job, as the porcelain basin is heavy. We of course first shut off the power before starting on the vanity light. Once we disconnected the electrical wires, we put the wire nuts back over the exposed wires out of an abundance of caution. To remove the mirror we taped it to catch any potential breaks, then used small wooden craft and paint stirrer sticks to start pushing the mirror away from the wall. This took some time and some of the adhesive spots were more stubborn than others, but the mirror stayed intact!
We then cleaned all of the walls with just some water and a little dish soap before patching. We used this for small holes from hardware and this for the two very large holes left from removing the pedestal sink. The large holes took a couple of coats and you will need sand paper to even it out after each layer has dried. I was honestly terrified about patching the big holes since I had only ever done small patches before, but it was so much easier than I anticipated and kind of enjoyable.
We then touched up the wall texture where needed. That was primarily over the two big patched holes and some areas where the adhesive on the mirror pulled it off. I highly recommend testing on some cardboard to get the setting just right to match your current wall texture. We have “orange peel” texture on our walls. This is what we used and we were so happy with how well it matched! Again have some sand paper on hand. Even if you mess up, it is super easy to sand and fix!
From there we wiped down the walls one more time before priming and painting. This is my go to primer, especially for any area that gets exposed to humidity or heat. The paint color we chose was Benjamin Moore Cloud White in an eggshell finish. Since we didn’t remove the toilet, we used those large black trash bags and a little tape to keep it covered during this process.
Step 2: Little & Unexpected Fixes
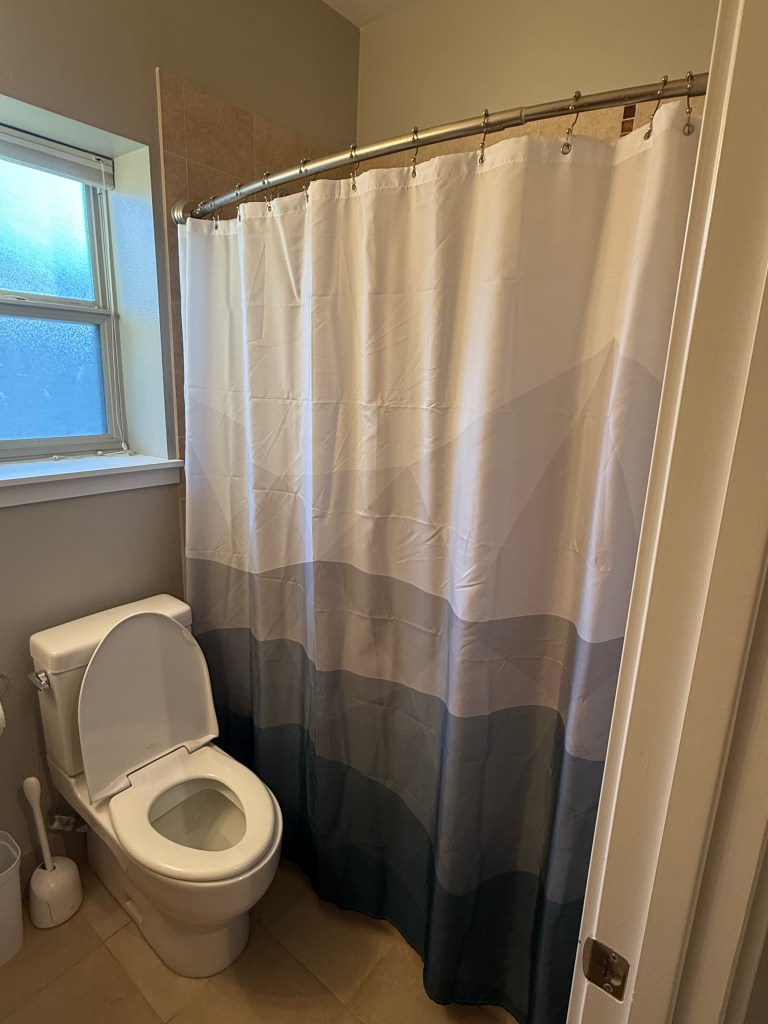
We did not replace any of the tile. It was in good shape so there was no need for that major major expense. But we still put in some TLC to neglected areas from the previous owners. A big one was resealing the area around the tub. It had cracked in spots and you definitely don’t want that in an area that is exposed to water. It is time consuming, but absolutely worth it. We used a utility knife to cut out the old sealant, which was the most time consuming part. From there, we used this to reseal it.
Another unexpected hiccup was that one of the wires in the vanity light electrical box had corroded and snapped off making the wire coming out extremely short. The builders also put in a stud to support the box, so we were unable to pull out any slack ourselves. We got a couple of quotes from local electricians and one was able to cut into the stud and move things around to get enough slack without having to cut into the drywall. We didn’t budget for this expense, but it was important that it was fixed properly and to code.
Step 3: Installing the Vanity & Other Fixtures
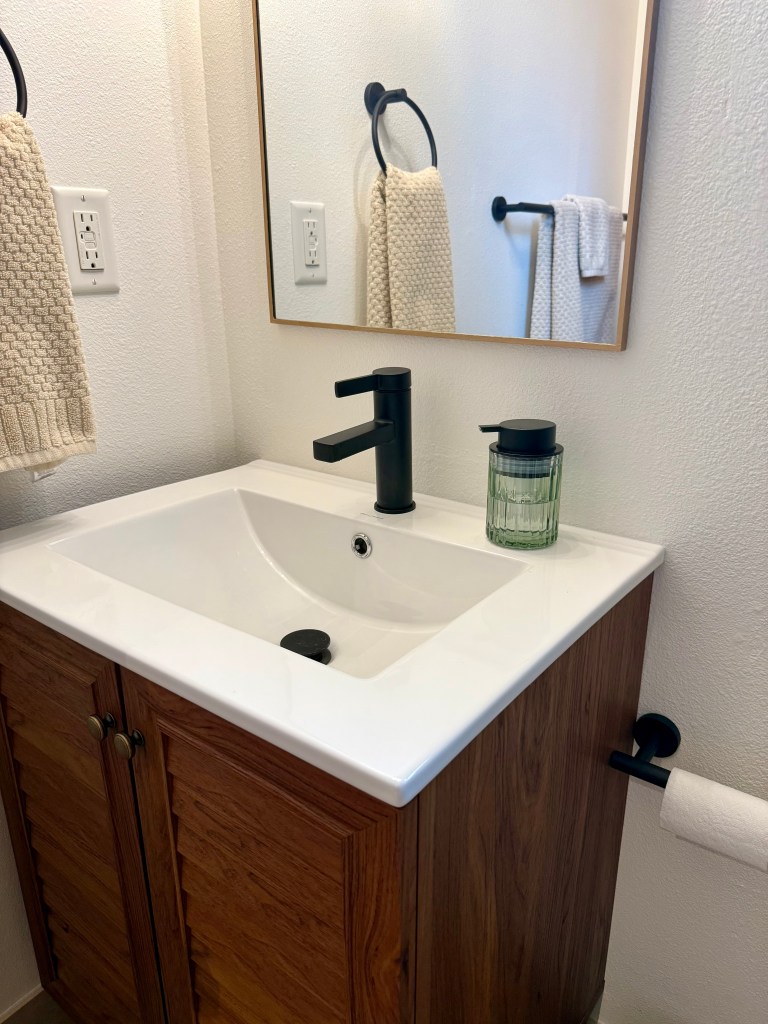
Installing the vanity was a pretty straightforward process. First thing was securing the sink to the vanity cabinet using this caulk. We could have used the tub and tile sealant as well, but we had purchased this first. It is also in a super easy to use squeeze tube that is prefect for small projects and doesn’t require a caulk gun. After securing the back of the vanity to the wall, we used that same caulk to create a seal between the sink and wall. This not only better secures it in place, it keeps water from seeping back between the vanity and the wall. From here installed the new faucet and drain. We kept the p-trap from the previous sink, but took the opportunity to give it a nice deep clean.
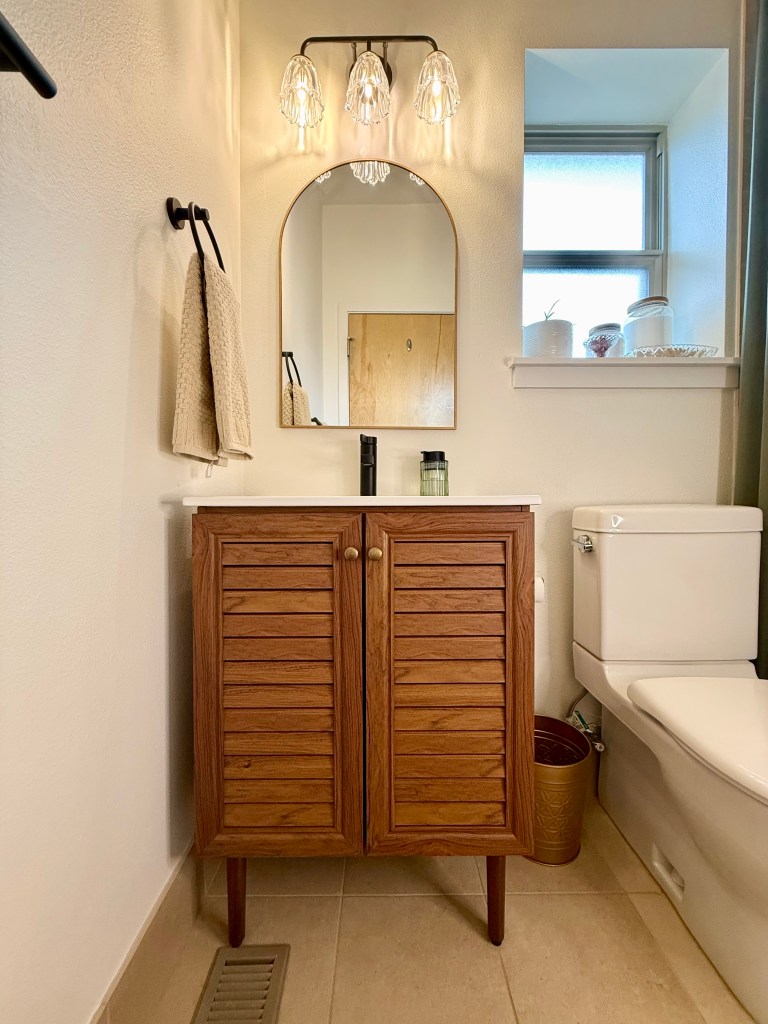
From there it was hanging the light fixture, mirror, hardware, etc. on the walls. The vanity light is SO PRETTY! I love it so much and designed the entire bathroom around it and the vanity. I couldn’t find quite the right brass gold mirror, so I decided to buy a basic gold one and then use rub n buff. Would I do that again? Absolutely not. The metal was too smooth, so it would not take. I had to use a couple layers of a bonding primer and it took so much more work. Next time I would spray absolutely paint the frame. This tested every ounce of patience I had left.
Step 4: Styled Shower Curtains & Decor
I chose curtains that were meant for windows to create a more elevated look. I knew I wanted an olive color, but I chose these specific curtains for a few reasons. They came in long length options, so I could hang them above where the tile stopped. They also had memory trained pleats with back tabs and came with pleat hooks. I used the pleat hooks to attack the shower curtain liner. The curtains came in 2 panels and I considered keeping them pinched together and keeping the liner intact when attached to both panels, and if it got more shower use I probably would have or would have done double rods. Instead, I cut the liner in half and it all still closes for a shower and I love the look of the double panel.
Before After
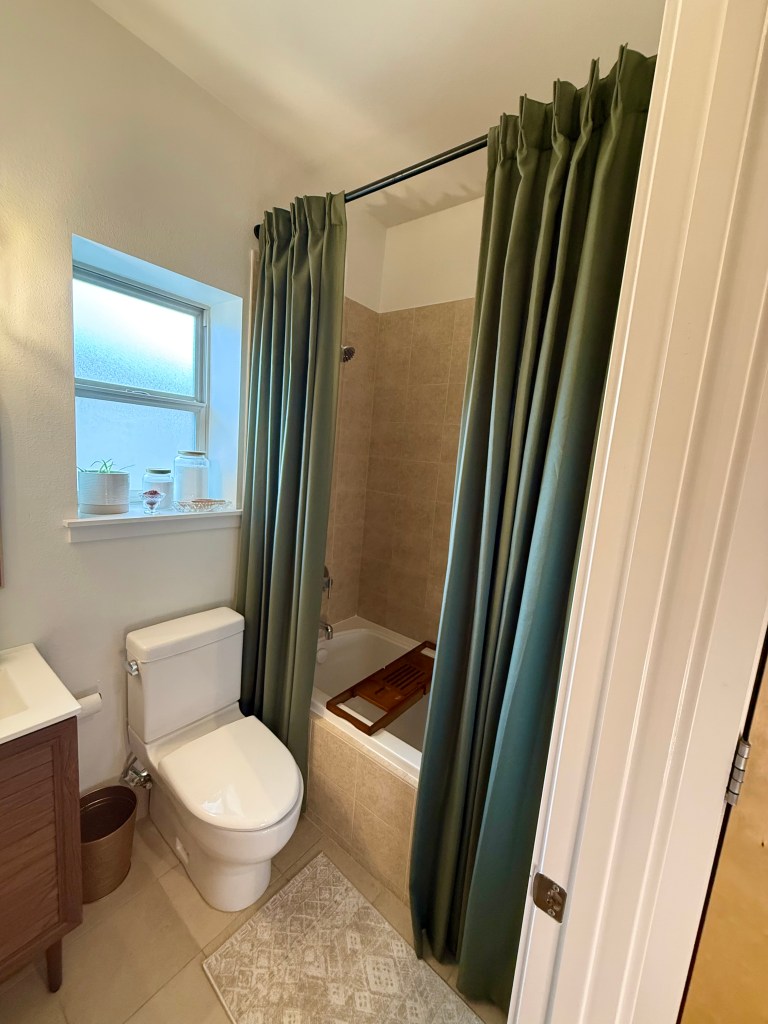
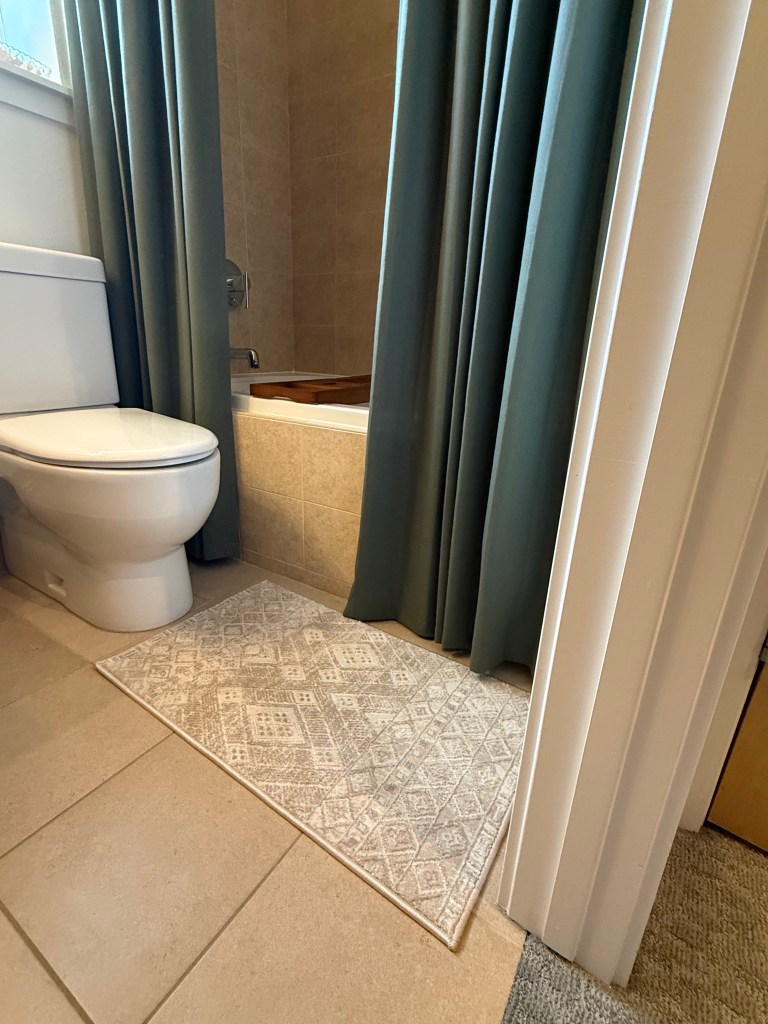
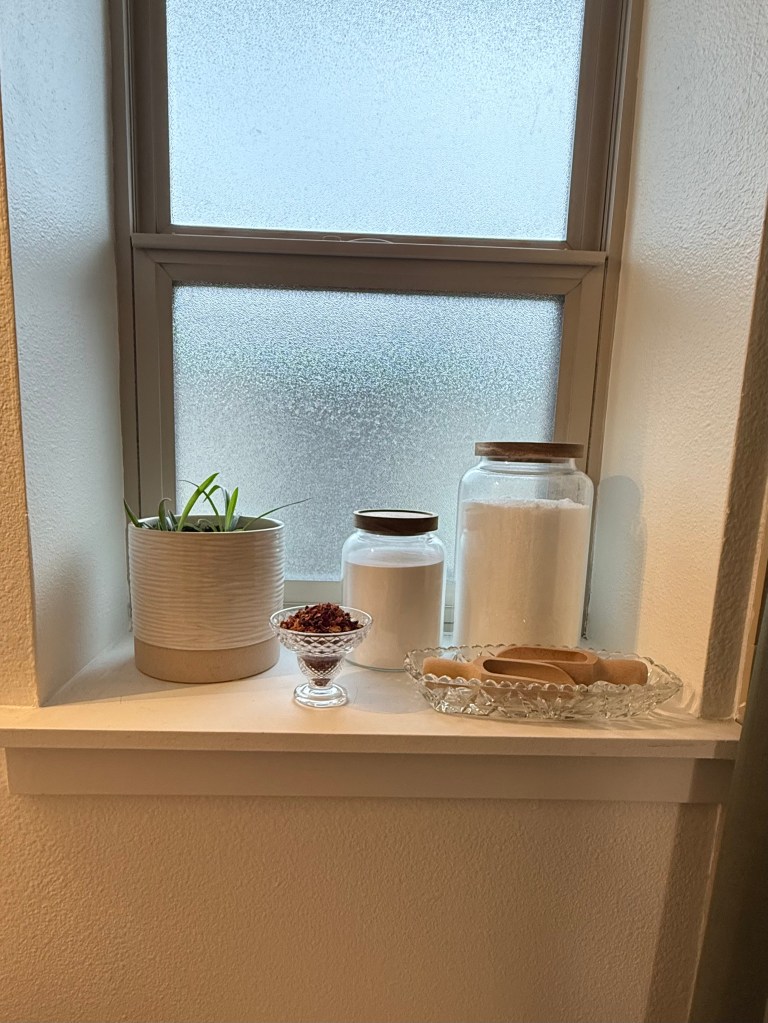
For decor, we wanted to keep it simple and leave space for guests. Will the walls eventually get some artwork? Yes, but I haven’t found the right pieces yet, which means I might end up just creating my own. The brass waste basket matches the brass on the vanity light. The towels were found at Costco and they are so soft. The window gets great light, so we knew we needed a plant to sit in the window sill! The other main use for the bathroom is the tub, so containers for bath salts and a bathtub tray were a must. I found a brand new entryway rug at our local Habitat for Humanity ReStore. This is a great alternative to a bathmat. They are meant to handle moisture and are easy to clean while elevating the look of a bathroom. I also found the crystal pieces in the windowsill at the ReStore. We are also a foaming soap household, but pretty foaming soap dispensers are hard to come by. I love the one we found!
Before After
Before After
Final Thoughts
I hated this bathroom. The walls were gray, it felt dark, no builder fixtures had been replaced, it had no functional storage, and didn’t work well for guests. At first I didn’t think I could make it what into what I wanted without gutting it entirely. Once I took a step back and thought through how to work with the space and the tile that didn’t need replacing, everything came to life. I now love this bathroom. It is neutral and earthy, which will be great for when we are ready to sell, but it also now feels so much more like “us.” I love vintage touches, so being able to incorporate that without making it so integrated into the home itself was a great way to keep personality without having to worry about deterring future buyers.
